As Rainbow Six Siege prepares for its monumental transition to Siege X later this year, Ubisoft has deployed its final operator for the current era: Rauora. This New Zealand-born attacker arrives not with overwhelming firepower, but with a tactical gadget poised to redefine bomb site execution. Her D.O.M. Panel Launcher introduces unprecedented control over doorways, offering teams a bulletproof solution during critical planting phases—a fitting swan song for Siege's evolving meta. Operators seeking to master the last months of classic Siege gameplay would be wise to study her unique toolkit. 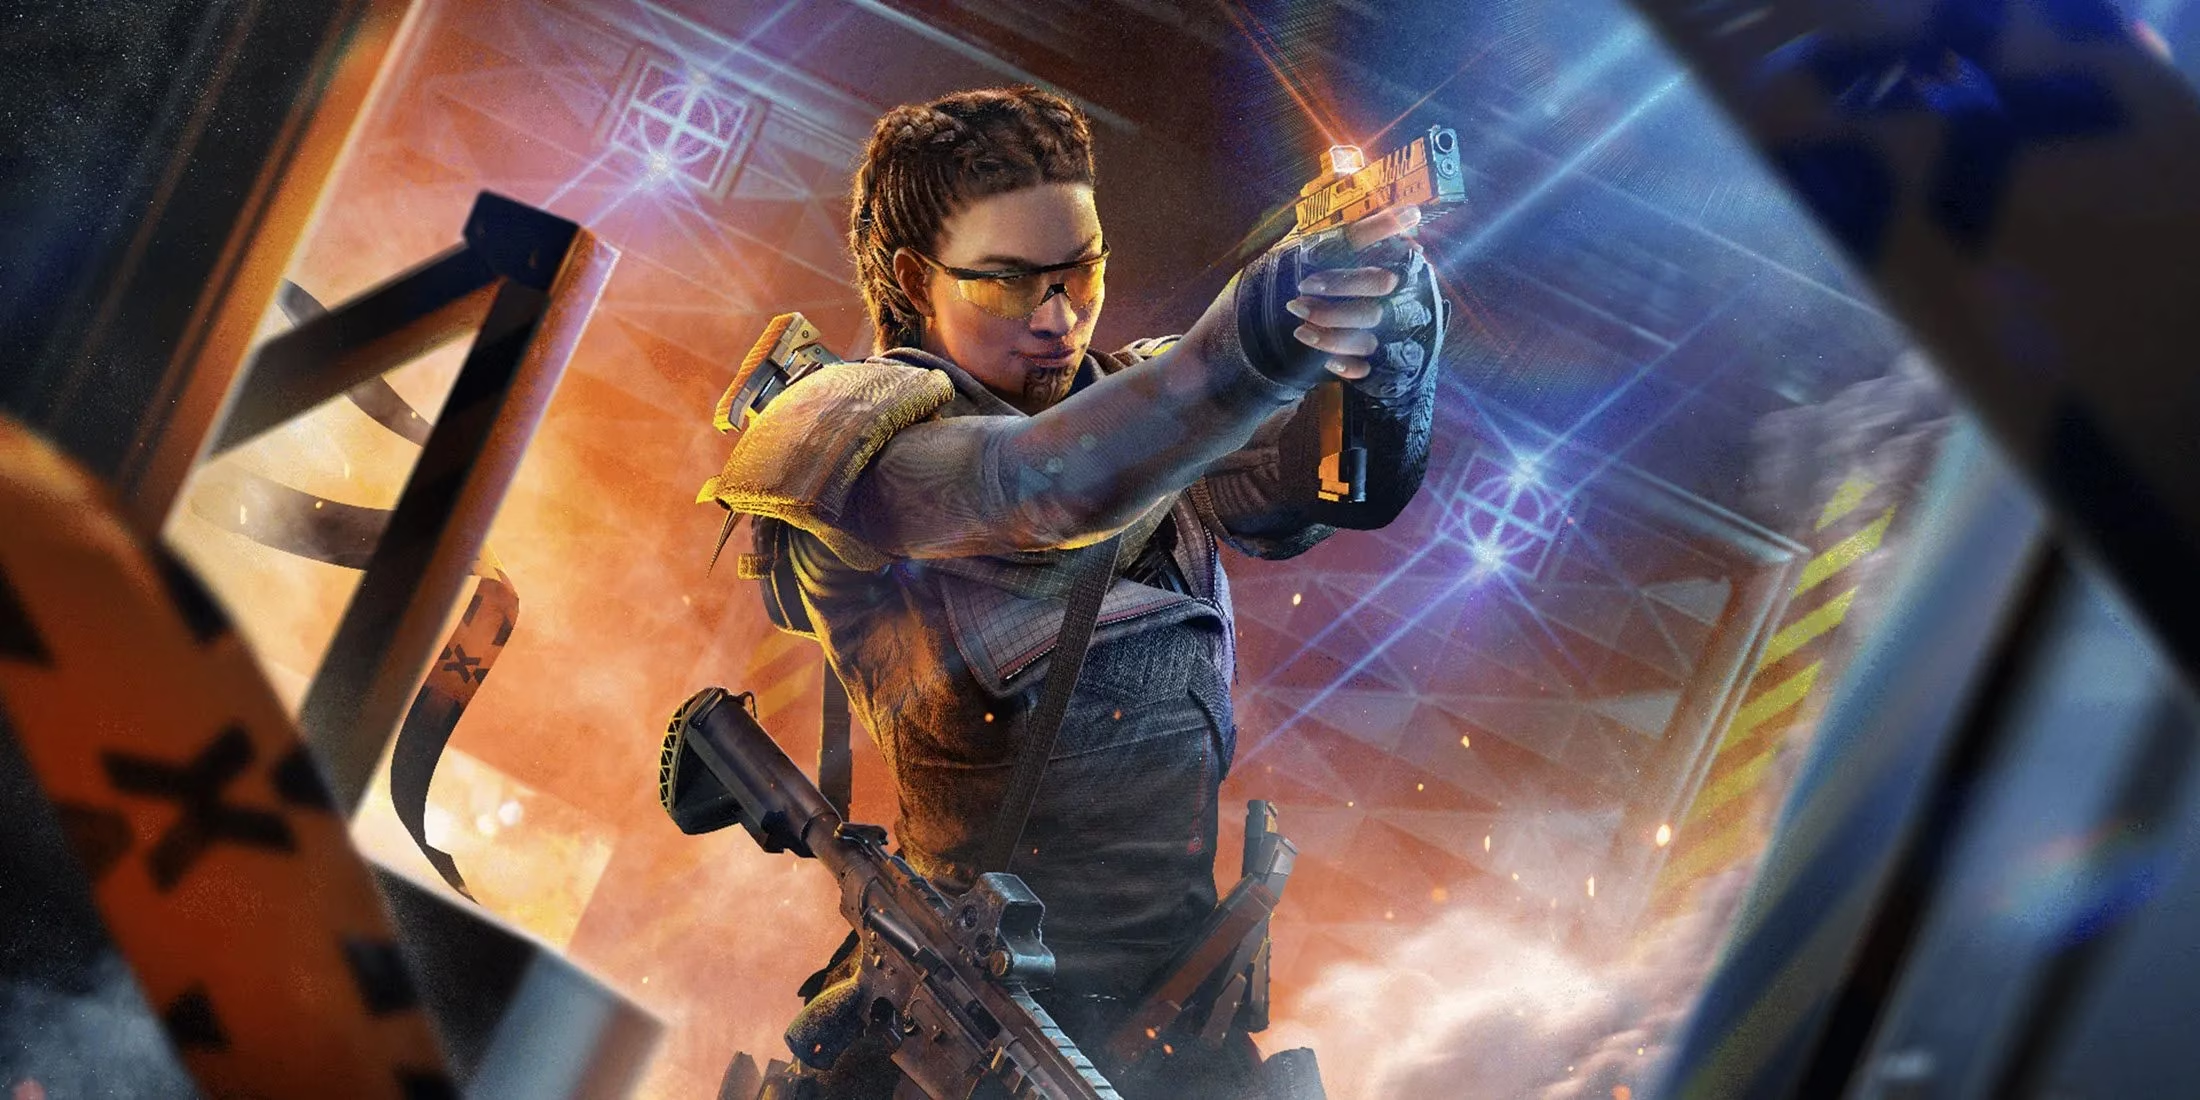
🧩 Operator Profile: Hāpai Iwini
-
Real Name: Hāpai Iwini
-
Age: 29
-
Origin: Christchurch, New Zealand
-
Armor/Speed: 2 Armor / 2 Speed
-
Role: Site Execution Specialist & Flank Control
Rauora thrives in coordinated attacks focused on objective play rather than pure fragging potential. Her value crystallizes during defuser plants, where her gadget transforms chaotic doorways into calculated chokepoints—a digital barnacle clinging stubbornly to entry points. Unlike explosive-focused attackers, she controls space through denial, forcing defenders into predictable counterplays.
🔫 Loadout Analysis: Precision Over Spray
Rauora’s arsenal rewards tactical positioning and trigger discipline. While not the most destructive, her weapons offer versatility:
Primary Weapons
| Weapon | Type | Magazine | Playstyle Suitability |
|---|---|---|---|
| 417 Marksman Rifle | Semi-Auto DMR | 20 | Long-range precision |
| M249 LMG | Full Auto | 100 | Suppressive fire / Hold angles |
The 417 delivers punishing single shots ideal for holding angles, while the M249’s massive magazine suits anchoring or covering plants—its recoil pattern unfolding like a drunken calligrapher's signature across walls. Choose based on team composition and site approach.
Secondary Weapons
-
Reaper MK2 (New!): High-capacity automatic pistol (34 rounds). Suffers from significant recoil and modest damage. High-risk, high-reward panic option.
-
GSH-18 Handgun: Reliable semi-auto sidearm. Trusted by veterans for consistent finishing power.
Secondary Gadgets
-
Smoke Grenades x2: Essential for obscuring sightlines during plants. Synergizes perfectly with her bulletproof panels.
-
Breaching Charges x3: Situational for soft destruction. Generally overshadowed by smokes' tactical value.
💡 Recommended Loadout: 417 Marksman Rifle + GSH-18 + Smoke Grenades
⚙️ D.O.M. Panel Launcher: Tactical Architecture
Rauora’s defining gadget fires deployable, bulletproof panels onto doorframes (excluding Castle-barricaded doors). These panels:
-
Create instant bulletproof barriers blocking vision and rotation.
-
Feature a protected trigger mechanism:
-
Attackers shooting it opens the door after 1 second.
-
Defenders activating it opens the door after 3 seconds.
-
-
Automatically open slightly at the bottom for drone passage.
-
Are vulnerable to ANY explosive damage.
-
Can be instantly destroyed by Oryx's Dash.

Crucially, Rauora gains panels over time, starting with 1 and accumulating up to 4. This makes her, like Lesion, increasingly potent in longer rounds—a tide slowly depositing tactical seashells throughout the action phase. Deployment requires:
-
Clear doorframe (no barricade).
-
Equip launcher and aim at frame.
-
Fire (left-click).
⚠️ Warning: Projectiles can be intercepted by Jäger’s ADS or Wamai’s Mag-NET. If caught by Wamai, the shot is permanently lost.
🎯 Advanced Playbook & Counter Strategies
Mastering Rauora demands understanding her synergies and vulnerabilities:
Pro Tactics ✅
-
Plant Shield: Deploy panel immediately before planting. The 3-second defender delay creates vital planting cover.
-
Flank Lockdown: Seal high-traffic rotation paths (e.g., 2F Kafe Bakery to Mining). Panels act like tactical tourniquets on map flow.
-
Audio Intel: Listen for distinct panel opening/closing sounds to track defender movements.
-
Rapid Deployment: Chain multiple panels quickly to isolate entire sectors.
-
Claymore Trap: Place claymores facing closed panels for free kills on dashing Oryx players.
Counters & Weaknesses ❌
-
Explosives Are Key: Bring operators like Ash, Zofia, or impact grenade users to clear panels.
-
Oryx Hard Counter: His dash instantly shatters panels. Force him to waste charges.
-
Jäger/Wamai: Deploy strategically to eat panel projectiles before they attach.
-
Trigger Range: The shootable mechanism activates only within 6 meters. Defenders outside this range cannot interact.
-
Panel Cycling: Shooting the trigger again closes an open panel. Use for re-establishing control.
-
Vision Denial: Remember panels blind both sides. Coordinate with teammates!
🚀 The Rauora Meta: Shaping Siege's Final Chapter
Rauora isn't about fragging; she's about dictating the terms of engagement during Siege's most critical moments. Her panels force defenders into uncomfortable choices: waste precious utility breaching, take risky rotations, or concede planting time. In coordinated stacks, she enables near-guaranteed plants on sites with key doorways. Solo players can effectively lockdown flanks, turning chaotic matches into structured sieges. As the clock ticks toward Siege X, mastering Rauora offers a profound understanding of tactical space control—a final lesson in Rainbow Six's core design philosophy. Her legacy will be measured in secured defusers and frustrated roamers, a testament to strategic innovation over brute force.